Blogger Widgets

Sunday, 1 July 2012

Braised Duck With Sea Cucumber & Mushroom

When I cooked dinner at night, I don’t usually post the dishes up to my blog.  Why?  Hmmm….. call me lazy or too much things to do to prepare for dinner or I am not good with my camera shot during night time.  This is why I seldom post dishes I cooked for dinner.

But since I have the time yesterday, I post this Braised Duck with Mushroom & Sea Cucumber.


Braised Duck With Sea Cucumber & Mushroom
Recipe source from kuali.com

Ingredients

    • 600g duck (I used all Duck drumstick)
    • 500g sea cucumber, rinsed, sliced thickly and well drained
    • 6-7cm ginger, sliced
    • 1 tbsp Chinese rice wine
    • 10 dried Chinese mushrooms, soaked to soften
    • 1 tsp chopped garlic
    • 2-3 tbsp oil
    • 1/2 tsp sesame oil
    Marinade (A)
    • 2 tbsp light soya sauce
    • 1 tbsp Premium oyster sauce
    • 1 tbsp thick soya sauce
    • 1/4 tsp salt
    • 1/2 tsp sesame oil
    • 1 tsp Chinese rice wine
    • Dash of pepper
    Sauce ingredients (B)
    • 1 ½ tbsp light soya sauce(½ tbsp is enough)
    • 2 tbsp Premium oyster sauce (½ tbsp is enough)
    • 1 tbsp thick soya sauce
    • 3/4 tsp salt (should opt this out)
    • 1 tbsp sugar or to taste
    • 1/2 tsp pepper
    • 2 - 2 ½ cups chicken stock
    Thickening
    • 1/2 - 1 tsp corn flour mixed with 2 tbsp water

 
Method

Season duck with marinade (A) for several hours or preferably overnight.

Heat a saucepan (without oil) and put in ginger slices and sea cucumber, then fry for 4-5 minutes until most of the water has evaporated. Pour in wine and toss briefly for 10-20 seconds. Remove sea cucumber and discard the ginger slices.

Heat saucepan with oil and sesame oil, then fry garlic until lightly golden and fragrant. Add mushrooms and fry a minute. Put in marinated duck and cook for 1-2 minutes. Add sea cucumber and stir in sauce (B). Bring to a boil, then reduce the heat and simmer for 40-50 minutes or until duck is tender.

Thicken sauce with corn flour mixture.


I cooked and used the original Sauce Ingredients and I feel it is salty for me and my family.....next time should cut down the soya sauce and oyster sauce as I indicated at the side there....


Thursday, 28 June 2012

Apple Hand Pies

My family and I loves apple pies.  What about you?  Instead of the normal apple pie tart, today I have baked it into small hand pies; more easy to handle and nibble away.  Some called it pie pockets.  Whatever you wanted to name it, these little pies are yummy.

When I am in a dilemma to which pie dough or crust I intend to choose from, well, as I have mentioned previously, you never go wrong using Martha Stewart's recipes.


Apple Hand Pies

Basic Pie Dough Ingredients
160g all purpose flour
½ tsp salt
½ tsp sugar
113g butter
2tbsp – 4 tbsp ice water

Directions
In a food processor, combine flour, salt, and sugar; pulse to combine. Add butter; pulse until mixture resembles coarse meal, with just a few pea-size pieces of butter remaining.  (Alternatively, you can use your hands to lightly combine together).

Sprinkle with 2-3 tbsp ice water. Pulse until dough is crumbly but holds together when squeezed with fingers.  

Wrap the dough in plastic wrap and refrigerate at least 30 minutes.


Filling Ingredients
2-3 apples, diced small
35g brown butter
60g sugar
1 tbsp raisins, snip to half
½ tsp cinnamon powder
1 tbsp plain flour


Heat frying pan to melt butter and sugar.  Add in the diced apples and raisins, stir fry till apples tender.

Add in cinnamon powder and flour, stir well and dish up.
Leave to cool.
 
Remove dough from fridge and let stand 5 minutes on room temperature.

Roll out dough about 1/8” thick on flour surface.  Cut out the dough with round cookie cutter, place a spoonful of apple mixture in the center of the dough circle.

Gently brush the edges with the beaten egg. then top with a second dough circle, gently pressing around the edges to help the dough adhere.

With a fork crimp the edges of the pies to seal.   Using your small knife, cut few slits on the top. Brush the tops of the pies with beaten egg, then dust with the sanding sugar.

Bake the hand pies at 160C for about 20-25 minutes.


    Delicious to be eaten when it is still warm.  This pies is delicious using this pie dough,  
    unless you have a better version, do let me know and I shall try yours!


Wednesday, 27 June 2012

Homemade Kaya (Coconut Jam)


I seldom buy kaya because most of the kaya sold either is too sweet or if the one that suits my taste would be too costly for a just a small jar.  So it is better to make my own to suit to my little less sweet taste.


Homemade Kaya (Coconut Jam)
Recipe source from AlmostBourdain with slight changes

Ingredients
4 eggs,  beaten and sieved
220g sugar
50ml pandan / screwpine water
(blend 5 pandan/screwpine leaves with 50 ml water in a blender and sieve the mixture)
250ml coconut milk, sieved


Method:
Put sugar and pandan water in a heavy-based pan and boil until sugar dissolved and caramelised.
Remove from heat and pour in coconut cream / milk and eggs.
Cook and stir constantly in low heat for 25-30 minutes until the mixture is smooth and thicken.
Remove from heat and leave to cool.


         Makes about 460g.....


Tuesday, 26 June 2012

Char Siew Soh (叉烧酥) / BBQ Pork Puff Pastry

I think I have been baking alot bakes using puff pastry method.  There are still alot more recipes I like to try eventhough it takes some time especially kneading, rolling piece by piece of the dough.

I am still trying to find the right texture of the crisp of the layer.  I saw one recipe using the water dough with full bread flour which is too hard to knead it out for me.

I have made Siew Pau just last month and that was the first time I'm trying on puff pastry.  Call that real hard work, kneading and rolling for me.  And then, I try making the Wife's Cake/Lou Poh Paeng too.  I guess I must be getting the feel of making puff pastry bakes.  Today, I am posting Char Siew Soh, and I think both this Siew Pau and Char Siew Soh doesn't have much of difference in terms of the filling or the puff pastry; it is just the shape only.

I am using the Water & Oil Dough ingredients from Sugar & Everything Nice in the puff pastry but the filling is the same as the Siew Pau I made previously.

 
Char Siew Soh (叉烧酥) / BBQ Pork Puff Pastry
 
Water Dough
200g all-purpose flour, sifted
100g water
50g vegetable shortening
50g icing sugar

Oil Dough
200g all-purpose flour, sifted
100g vegetable shortening

Method
1. Water dough
. Rub oil with flour until it looks like breadcrumbs.
. Dissolve sugar and syrup in water and add to the above. Mix together to form a
   smooth dough. Cover and rest for 15 mins.
. Divide dough into 18 pieces.

2. Oil Dough
. Rub shortening gradually into the flour to form a soft dough. Cover to rest for 15
   minutes.
. Divide dough into 18 pieces.

3. Wrap oil dough into water dough and flatten it.
4. Roll out into a longish flat piece. Roll up like a swiss roll).
5. Turn 90 degrees, and repeat the rolling up 2 – 3 times.


Ingredients
300 gm char siew (bbq pork) (chopped into small pieces)
5 Tbsp frozen peas
chives or spring onions (optional)
4 tsp oil

Seasonings                                         Topping
6 Tbsp water                                         1 egg (beaten)
2 tsp sesame oil                                     2 tbsp toasted/fried sesame seeds
3 tsp oyster sauce
4 tsp sugar


1 1/4 tsp dark soy sauce
1 tsp cornflour
3 tsp peanut butter
dash of pepper
dash of chinese wine

Method
1. Mix seasoning together
2. Heat oil, add seasoning and simmer till gravy thickens.
3. Add bbq pork and the rest of the ingredients. Mix well
4. Remove and leave to cool before using as filling.


To Assemble
1.  Preheat the oven to 170 Celcius.
2.  With the heel of your palm, gently press the pastry down to flatten it lightly.
3.  Roll out the pastry into a flat circle. Spoon in about 1 tbsp of filling, wrap well and
      form into triangle shape.
4. Brush egg wash on the surface and sprinkle with sesame seeds.
5. Bake in the oven for 20-25 minutes or until golden brown.


    I've tried to form it in triangle shape but some have turned up into odd or out of shape!!


Monday, 25 June 2012

Brussels Sprouts With Walnuts

When I first saw Wendy of Table for 2 ....or more posting this Brussels Sprouts on her blog, I thought I won't be able to cook and taste it because brussels sprouts selling here is costly.  A punnet is about $11.00.  

I came to love brussels sprouts when I stayed in NZ for a short period of time.  That time, it is my ex who cook this for me.  But I was sooooooo happy when I was in for a bargain the other day.  I bought a punnet for only $1.80!!  Can you believe that??

Today, I am more than happy that I can have my brussels sprouts and have tried for Wendy's recipes.  She is also a guest host at Quaypo Cooks for this recipes.

Brussels Sprouts With Walnuts
Adapted from Wendy of Table of Two....or more with slight changes
150gm Brussels sprouts
½ Tbsp butter
¼ tsp salt

10 walnuts or more, chopped
½ Tbsp butter
½ tsp sugar

1 tsp lemon/lime juice

Directions
1. Wash and trim brussel sprouts. Cut into half lengthwise and slice thinly.

2. In a cold pan, on medium heat put in butter. When butter starts to melt, turn 
    heat to low. (don’t wait for fully melted).

3. Put in sliced brussel sprouts and spread it around. Do not toss them. Just 
    leave it there for 1 minute. After that, lightly toss it and cook until slightly   
    wilted. Put in salt and toss it. Taste to see if it’s salty enough and to check its 
    doneness. Should be crispy but cooked. (If it taste sulphurous, it’s overcooked.)
    Place cooked brussel sprouts into a serving plate.

4. In the same pan, put in butter and chopped walnuts.

5. On low heat, sauté hazelnuts until they are very very slightly golden (you will 
    notice it is no longer as white but turns to a cream colour). Put in sugar and 
    cook until the sugar melts.

6. Pour walnuts and all that is in the pan over brussel sprouts. 

7. Pour lemon/lime juice over just before serving.


     Thanks, Wendy, it is very delicious.... as I have followed the steps to cook this in low heat.


       I have used walnuts here as I don't have hazelnuts.......

Saturday, 23 June 2012

Tish Boyle's Luxe Pound Cake (With Strawberry Compote)

I wakes up early this morning to get ready to bake my long overdue Tish Boyle's Luxe pound cake.  But when I opened my pantry cupboard to take out the cake flour, OMIGOSH!!!....... I have ran out of cake flour!  What should I do?  So, I thought I change my mind to bake a Chiffon Cake instead.  No....no....not yet.... suddenly I remembered that I can make my own cake flour.  Yes!!

Usually when I have set my mind to make and bake something, I usually will give it a thorough study on the recipe and the step by step to avoid any blunder in the last minute.  I never thought I have ran out of cake flour.  Lucky for me  previously I have came across from one blog advising that we can make our own cake flour.

I loves Tish Boyle's Pound Cake.  The previous Plainly Perfect Pound Cake I have made is so delicious even my neighbour has gave good praise in it too.

After bookmarked this Luxe Pound Cake for quite awhile, only today I made it. Shirley of @kokken has made this cake serve with Kumquat Compote but at this time of the year, I don't think I can't find kumquat at all unless I have planted it.  So I made some Strawberry Syrup to serve with this cake.


LUXE POUND CAKE WITH STRAWBERRY COMPOTE SYRUP
The Pound Cake adapted from Shirley of @kokken

Ingredients
  • 342g cake flour *** 
  • 1/4 tsp baking powder
  • 1 tsp salt
  • 227g unsalted butter
  • 330g caster sugar
  • 7 eggs
  • 1 tbsp vanilla extract
  • 240 ml heavy cream
Method
1. Preheat oven to 160C. Sift flour, baking powder and salt together. Set aside.

2. Place softened butter in a mixer fitted with a paddle fixture. Cream butter at medium
low speed. Add sugar in 3 separate additions, allowing sugar to be incorporated with
butter after each addition. The butter should be creamy and pale after all sugar has been
well mixed.

3. Add eggs one at a time, allowing the egg to be mixed well with the butter after each
addition.

4. Add vanilla extract.

5. Reduce mixer speed to low and add flour mixture in 3 portions, alternating each
    addition with a portion of the heavy cream until all flour is added.

6. Pour batter into a lined/ buttered pound cake pan.

7. Bake at 160C for 50mins or until a skewer inserted into the cake comes out clean.

8. Cool down cake to room temperature before turning out the cake carefully from the
    baking pan.

Note/Tips : ***
If you have run out of cake flour in your last minute of baking, here is the emergency solutions.
For every 1 cup of all purpose flour, minus out 2 tbsps  and add 2 tbsp corn flour in it.  Sift the flour 2-3 times.
And you can have Cake Flour......


Strawberry Compote Syrup

100g fresh or frozen strawberry
50g – 60g sugar

1.  Put both ingredients in a small pot and boil till syrup slightly thicken.


         I prefer to bake the pound cake in 2 loaf pans instead of using a bundt pan. 

    
       The pound cake is indeed delicious but heavenly delicious serve with this Strawberry 
       Compote syrup!!


             This Luxe Pound Cake is one of my keeper's now!

Thursday, 21 June 2012

Kuih Lapis / Nine Layer Kuih

I have not been sleeping well lately.  Sometimes I wake up at 4 am and keep tossing and turning....and so instead of keep on tossing on the bed, I on my computer to surf the net!

Browsing others' food blog with their beautiful photos usually would prompt me to brave myself to try to make the recipe eventhough I have never ever done that before.  And making kuih especially is not my favourite, I don't know why.  Just not good at it.

My sister S has made this Kuih Lapis many many times.  I would usually be sitting next to her watching her instead of giving my helping hands previously.  I remember she has made this using many different recipes for this Kuih Lapis.  Is she expert in this?  Well, I can say is, she is still trying to achieve.....hee...hee...

Today I make my first Kuih Lapis though it is not to my satisfaction compare to the original recipes that I had followed.  I feel the texture a bit soft.  The first layer after steaming, there were alots of air bubbles popping out (I don't know it is the right thing or not) and I got panic and I quickly scraped it off and start off again.


Kuih Lapis / Nine Layer Kuih
Adapted from Seasalt With Food

Ingredients
160 g Castor Sugar
600 ml Water
3 Pandan Leaves, washed & knotted
200 g Rice Flour
6 Tbsp (60 g) Tapioca Flour
1 Can/400 ml Coconut Milk
1/8 tsp Sea Salt
Red Food Coloring

Equipment
20 cm Round or Square Baking pan/tin, lightly greased

Method
1.  Bring the sugar, water, and Pandan leaves to a boil, reduce the heat and simmer for about 
     8 to 10 minutes. Let cool slightly and discard the pandan leaves.

2.  In a large bowl, mix the rice flour, tapioca flour, coconut milk, sea salt and the sugar 
      syrup. Stir until well blended and let the mixture rest for an hour. Strain the mixture
      and divide into 2 portions. Set aside one portion uncolored and about 4 to 5 small drops
      of red coloring to the other portions.

3.  Place the greased pan in a steamer over high heat. Start with the colored mixture, pour 
      ½ cup into the pan, set the timer for 6 minutes, and wipe the pot cover after every layer 
      is done. (Stir the batter every time before pouring the next layer.) 

      Continue with the uncolored layer and keep alternating the color layer, add a few extra 
      drops of red coloring for the 9th layer, stir well and pour it over the steamed layer and
      steam for about 10 minutes. 
      Remove from the steamer and let cool completely, about 5 hours, then cut the kuih into 
      desire shapes and sizes.

      NotePlease use a plastic knife to cut or wrap the metal knife with clingfilm.


                     It can easily peel off layer by later........   

Friday, 15 June 2012

Sweet Peanut Cream Dessert 花生糊

I believe you must have tasted this Sweet Peanut Cream Dessert Soup 花生糊 in the Chinese restaurant after your meal.  Some of you might have thought that this is a troublesome to make at home because you have to dry fry the peanuts, then have to remove the skin, thereafter blend to puree only to cook it.  All this steps have to take a little time.

But today, this Sweet Peanut Cream Dessert is made in a jiffy without much hassle and it taste so yummy and delicious.   

I urge you to give this a try too and hopefully you will agree with me this dessert is super yummy.


Sweet Peanut Cream Dessert Soup 花生糊
Serves about 6 rice bowls

Ingredients
6 tbsp sweet peanut butter
6 red dates
6 cups water
8 tbsp sugar
5 tbsp cornstarch paste

Procedures
1.  Mix the 6 tbsp peanut butter with 1/2 cup of water in a bowl until well mixed.  Then
     add an additional 1/2 cup of water.  Mix well.  Repeat this procedure until the 2 cups
     of water have been used up.

2.  Put the other 4 cups of water and 8 tbsp sugar into a pot.  Bring it to a boil.  Then add
     the peanut butter paste; mix thoroughly until it boils again.  Thicken it with cornstarch
     paste.  Pour it to a large serving bowl.

3.  Soak the red dates in warm water for about an hour.  Remove the seeds and dice the 
     pulp finely.  Then sprinkle over the peanut cream soup and serve. 


      This dessert soup tastes much better if you want to add additional 3 tbsp fresh cream or 
      condensed milk before adding the dates; for more creamier taste. 


I am submitting this post to Aspiring Bakers # 20 Asian Dessert Buffet! (June 2012) hosted by Food Playground


Thursday, 14 June 2012

Braided Bread Rolls

If I happen to come across any cakes or bread recipes using poppy seeds, I usually will bookmarked it.  And this is one of it.  


Braided Bread Rolls
Adapted from Grown To Cook

Ingredients
500 g all-purpose or unbleached flour
½ tsp dry yeast
300 ml milk, tepid
50 g cold butter
½ tsp salt
Glaze:
1 egg yolk, lightly beaten
poppy seeds or sesame seed (to sprinkle on top)

1)  Dissolve the yeast in the milk (the milk must not be too warm or the temperature will kill 
      the yeast). Keep about 100 g flour apart and put the rest in a large bowl. 

2)  Make a well in the center and pour in the warm milk. Mix in some of the flour to make a 
      sponge in the middle of the bowl. Slice the butter and put the slices around the sponge 
      the warmth of the sponge will soften the butter slightly and make it easier to
      incorporate)  and sprinkle the salt on top of the butter. Cover the bowl with plastic and 
      leave for about 20 minutes, until bubbles have formed. 

3)  Then mix everything together and knead until the dough feels silky and smooth. Add as 
      much of the flour as necessary to keep the dough from sticking, but no more ( you will 
      probably not use all the flour). 

4)  Cover the bowl and set aside to rise until doubled in bulk, an hour or more depending on 
      the room temperature. Because of the butter content, it is better to let the dough rise
      in room that is too warm.

5)  Divide the dough into 10 or 12 equal pieces. Roll each piece of dough into a tight ball by 
      rolling it on a wooden surface under the palm of your hand while pressing your thumb 
      from the side. It is easier to roll the dough on a surface that has not been dusted with 
      flour.

6)  Roll each ball into a rope, about 30 cm long and make a ball like thicker at both ends . Do 
      this gradually, letting the dough rest for a little while between rolling. Fold the ropes 
      (pleasego to here), twist one side into a loop and pull it over one of the ends.
    
7)  Preheat your oven to 225 degrees Celsius.

8)  Put the rolls on a baking sheet covered with parchment and let rise loosely covered with 
      plastic, about 20 minutes or until they almost double in volume. Glaze with the egg yolk 
      and sprinkle with the seeds, if desired.

9) Bake for 15 to 20 minutes, until golden. Let cool on a wire rack.


    Serve with your favourite jams and butter. 


    Hello there, I'm Chef M, care for a piece?  Have one please............. 

Tuesday, 12 June 2012

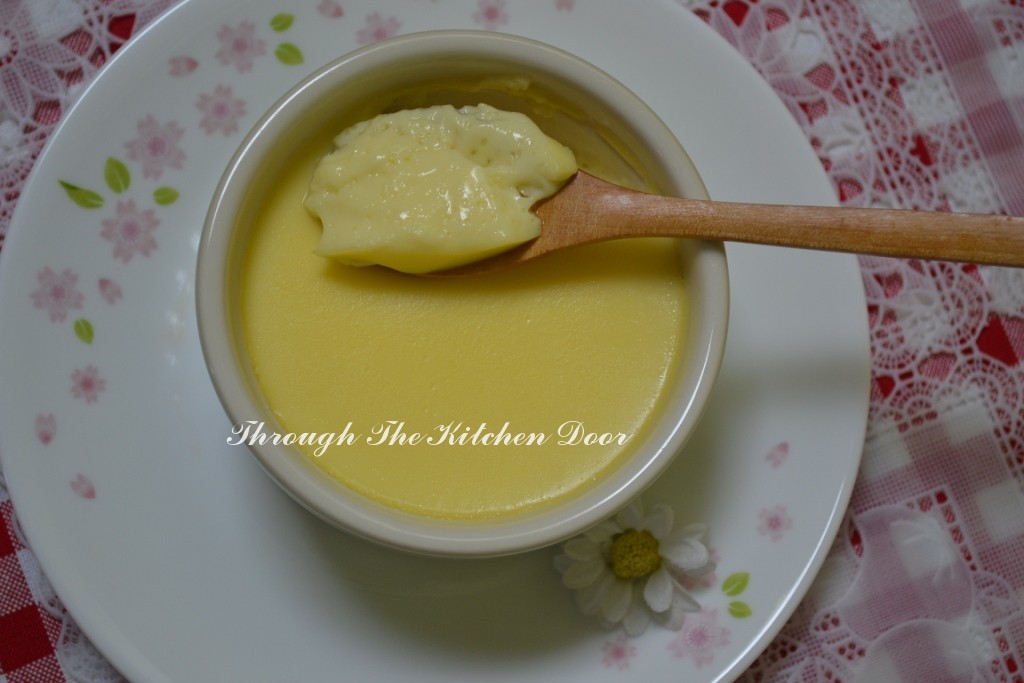
Steamed Egg with Milk Custard (鮮奶燉蛋)

I loves to eat dessert especially pudding whether it done by baking or steaming.  And I know my mum loves dessert the most.

I done my first pudding when I am still studying in the Home Science class.  I remember that time, after I've finished baking that egg pudding, I brought it back home for my mum to taste and she immediately loves it.  After that, I totally forgotten how to make it till now though it is so easy to make.  Herewith, after been lapse for so long, this is the steamed egg with milk custard.

I don't know whether this is something similar with the Hongkee used to eat "Dun Tan" or not; but correct me if I am wrong.

 
STEAMED EGG WITH MILK CUSTARD

Ingredients
3 eggs
170ml fresh milk
150ml water
60gm rock sugar
3-4 slices of ginger


1. Boil the water with the rock sugar and ginger slices till sugar dissolves.
2. Pour in the milk to slightly heat it up.  Let the syrup cool for about 10 mins.
3. Meanwhile, heat up a steamer,once the water boils, lower to medium heat.
4. Lightly beat the eggs and add in the warm syrup, mix well.
5. Strain the egg mixture into ramekins and remove any foam from the mixture.
6. Cover the ramekins with a piece of foil, place them in the steamer.
7. Steam over medium heat for about 20 to 25 minutes till custard is set.
8. Served warm or chilled.


 If you like egg tart, this pudding is something similar like that.