Blogger Widgets

Friday 23 December 2011

Merry Christmas everyone........and a Happy New Year 2012 !!


Merry Christmas everyone and Happy New Year.  Here I wish all of you in year 2012 good health and happiness be with you all at all times!

I never knew my last post was in November and now it is coming near to 2011.  I haven't been doing much baking lately and I can't even bake my own birthday cake!  Why?  I have dislocated my right shoulder somewhere in late November and till now I still need to wear my arm sling.  Hope it will recover soon.

I celebrated my birthday two days ago, and as I can't bake my own cake, I have no choice to buy a cake to celebrate with my family members with me.  My birthday cake this year is Chocolate Chip Walnut Cake from Secret Recipe!


Monday 14 November 2011

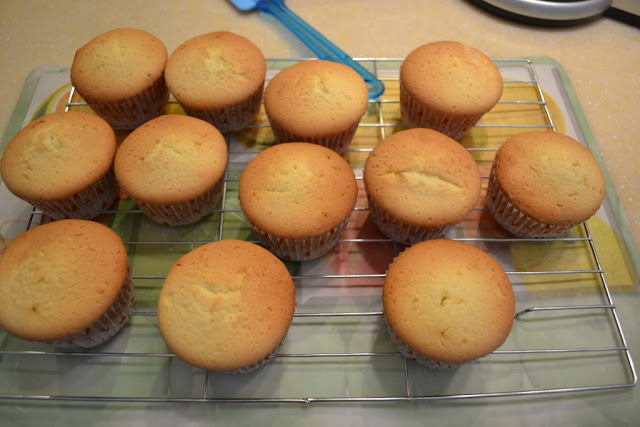
Coffee & Fruits Cupcake

Coffee and fruits in a cake, ah that's the combination I loves in my cake and more so with some walnuts in it.  The coffee aroma brings out the taste in it.

Coffee & Fruits Cupcake

Ingredients A
200g water
1 tbsp instant coffee powder
150g butter
180g brown sugar (I only added 130g because the mixed fruits already sweet enough)

Ingredients B
300g mixed fruits  (I only left 200g in my fridge)

Ingredients C
2 eggs
100g chopped walnuts

Ingredients D
260g plain flour
1 tsp baking powder
1/2 tsp baking soda

Method
1.  Cook Ingredients A until boils.  Add in Ingredients B, mix until well-blended.  Allow to cool.

2.  Add in Ingredients C, mix until well blended.

3.  Add in the sieved Ingredients D, mix until well combined.

4.  Pour it into the lined cupcake mould.

5.  Bake at preheated oven at 180Celcius for 15-20 minutes.


Friday 4 November 2011

Orange Poppy Seeds Chiffon Cake

I loves to eat Chiffon Cake because of its soft cotton like texture and I'm sure alot of you do too.  I can eat the whole chiffon cake!  The first few times I baked a Chiffon Cake was a flopped because I haven't master the technique good enough in whipping up the egg white well and another time I thought the cake already cooked but when I cut it out, it still looks moist and wet in the inside.  Quite a disappointment at that time.

My sister has requested me to bake this Orange Poppy Seeds Chiffon cake as this is her favourite. 


This recipe adapted from Kevin Chai - Chiffon Cake is Done with slight change of adding 3 tbsp poppy seeds in.

Orange Poppy Seeds Chiffon
Egg Yolk Batter:
7 egg yolks
50g caster sugar (you may cut down a little here as I find it sweet, just put 30g)
1/4 salt
3 tbsp poppy seeds
4 tbsp cooking oil (corn oil or sunflower oil or canola oil)
2 tbsp grated orange rind
60ml fresh orange juice
110g self-raising flour 
Egg Whites Foam:
7 egg whites
1/2 tsp cream of tartar 
110g castor sugar

Method:

Prepare the egg yolk batter: In a mixing bowl, combine egg yolk, salt and sugar. Hand whisk till the sugar dissolved. Add in oil, orange rind, orange juice  and poppy seeds. Stir till well combined.

Fold in flour until it forms batter and no lumps left. Set aside for later use. 

Prepare the egg white foam: In another bowl, beat egg whites till it form soft peak. Gradually add insugar till it finished. Add in cream of tartar and continue beating at high speed until frothy and stiff peaks form.

Pour batter into ungreased 9" (22cm) chiffon pan and bake in a preheated oven at 170C for 30-40mins or until it is cooked.

Remove from oven and immediately invert cake onto table until it is completely cooled before unmould it


Monday 31 October 2011

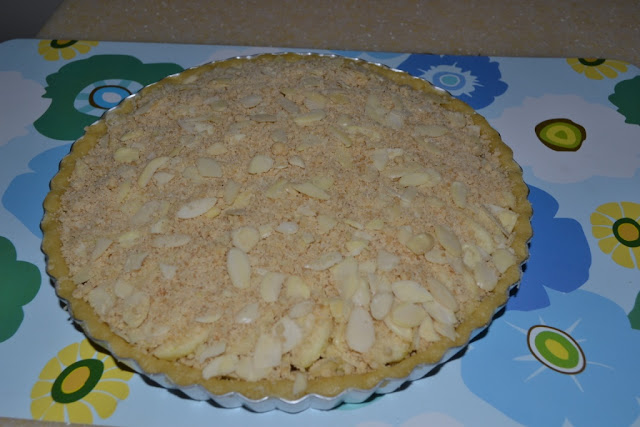
Crunchy Apple And Almond Flan

I was supposed to bake something else today but after opening up my fridge, I noticed few of my green apples are about to get wrinkles!!  Instead of going to waste of my apples, I quickly go thru my Pastry Cookbook where I have few recipes that I've bookmarked earlier.  So today I have baked this Crunchy Apple & Almond Flan.

This Crunchy Apple Almond Flan is very crispy when eaten warm and with the mixed spice in it, it sure does taste delicious. 


Crunchy Apple & Almond Flan
adapted from Best-Ever Book Of Pastry

Ingredients
115g all purpose flour
¼ tsp mixed spice
50g butter, diced
50g demerara sugar
50g flaked almonds
500g cooking apples, peeled, cored and thinly sliced
25g raisins
Sifted icing sugar, for dusting

For The Pastry
175g all purpose flour
75g butter, diced
25g ground almonds
25g caster sugar
1 egg yolk
1 tbsp cold water
¼ tsp almond extract
 
1.  To make the pastry, place the flour in a mixing bowl and rub in the butter.  Stir in the ground almonds and
      sugar.  Whisk together the egg yolk, water and almond extract and mix into the dry ingredients to form a
      dough.  Knead until smooth, wrap in clear film and leave in a cool place for 20 minutes.

2.  Meanwhile, make the topping.  Sift the flour and mixed spice into a bowl and rub in the butter with your
     fingertips.  Stir in the demerara sugar and flaked almonds.  Roll out the pastry.  Line a 23cm/9in
     loose-based flan tin, pressing the pastry neatly into the edges and making a lip around the top edge.  Trim
     off the excess.  Chill for 15 minutes.

3.  Place a baking sheet in the oven and preheat to 190Celcius.  Arrange the apple slices in the pastry case in
     overlapping concentric circles, doming the centre.  Sprinkle over the raisins.  Cover the apples with the
     crunchy topping, pressing it on lightly.

4.   Bake the flan on the hot baking sheet for 25-30 minutes.  Cool in the tin for 10 minutes.  Serve warm or
      cold, dusted with icing sugar.


   After sprinkle over the raisins, I top up another layer of apples before cover it with the crunchy topping.


  Ready to go into the hot oven!!

Wednesday 26 October 2011

Carrot Cake ..... my 2nd version

This is the 2nd time I've baked a carrot cake as each recipe there are sure to be in difference in the ingredients.  So I got to try which one taste better.  And alas, indeed, this carrot cake is real yummy!  So I will rate this to be a keeper too!  I shall give full credits and thanks to Quaypo and Sonia for this delicious carrot cake! 

I urge those who have not try baking carrot cake to give this a try. 


This yummy carrot cake adapted from Sonia's blog

Ingredients
150g finely shredded carrots
130g all purpose flour
1/2tsp baking powder
1/2tsp baking soda
1/2tsp salt
80g caster sugar
80g brown sugar
1/4tsp nutmeg powder
1/4tsp cinnamon powder
100g corn oil
1/2tsp vanilla extract
2 eggs, lightly stir
60g walnut, chopped 
40g raisins

Method
1. Sift flour, cinnamon, nutmeg, baking powder and baking soda in a mixing bowl.
2. Add in caster sugar, salt and brown sugar, stir well.
3. Add in carrots, corn oil, vanilla extract and egg, beat for few minutes till mixture well combined.
4. Add in walnut and dried fruits, mix well.
5. Pour in a greased and line baking pan, bake at pre-heated oven 180 Celcius for 40mins.
6. Cool on a wire rack and apply cream cheese frosting.

Cream Cheese frosting
 
Ingredients
150g cream cheese, at room temperature
40g butter, at room temperature
70g icing sugar, sifted
1tbsp lemon juices
Finely grated lemon zest from 1 lemon

Method
1. Beat cream cheese and butter till light and creamy.
2. Add in icing sugar and mix well on low speed.
3. Add in lemon juices and lemon zest, combine well.


I did not make the cream cheese frosting, unfortunate!  Maybe next time, and sure I will!

Monday 24 October 2011

Sicilian Orange Cake

I have made this Sicilian Orange Cake many times and even into as a cupcakes too.  This cake is a keeper.  Anytime you feel like baking a cake but do not know what cake to bake, this cake should be highly consider first.  I am sure everyone would love the aroma of the orange.

Last Friday was my dad's birthday and instead of trying to think what cake to bake for him, I think he would loves this simple cake as I know elderly wouldn't like with all those sweet icing topping with it.  My dad just loves this Orange Cake!


Sicilian Orange Cake
adapted from Sonia of Nasi Lemak Lover

Ingredients
250g unsalted butter, softened
180g caster sugar 
4 medium eggs
Grated orange zest from 2 oranges
250g self raising flour
120ml freshly squeezed orange juice
1/2tsp Rum, optional

Method:

1. Preheat oven to 180C. Grease and line a 9" round cake pan.
2. Using an electrical beater, cream the butter and sugar until light and fluffy.
3. Beat in the eggs, 1 at a time, beating well after each addition, if necessary adding a 
    spoonful of flour with
    the last egg to prevent the mixture from curdling. Beat in the orange zest and rum. Add 
    the flour all at once
    and mix well, then slowly mix in the orange juice.
4. Scrape the batter into the prepared pan and bake in preheated oven for 45-50mins or 
    until a skewer inserted into the center of the cake, comes out clean.
    (If it starts to brown too quickly, cover loosely with a sheet of lightly 
    greased aluminum foil. )
5.Leave the cake, in the pan, to cool on a wire rack, then unmold and serve.


Friday 21 October 2011

Braised Meatballs

Do you always had hard time cracking your head what to eat for lunch or what to cook for dinner?  I am sure all of you do.  The headache starts even when you are shopping at the grocery or the market.  What to buy first?

So whenever my 'headache' arises on this, I will go thru all my cookbooks again to check out.


Braised Meatballs

Ingredients
600g mince pork
1-2 slices bread
1-2 pcs water chestnut (chopped finely)
6 stalks baby bok choy
5-6 stalks spring onion
1 small piece ginger

Seasonings A
1/2 tsp salt
1 tbsp dark soy sauce
1 egg
dash of pepper
1 tbsp potato starch

Seasonings B
1 tbsp shaoxing wine
2 tbsp dark soy sauce
2 tsp sugar
dash of salt & pepper

Method
Crush 2 stalks of spring onion and the ginger, steep in 1/2 cup of water for 5 minutes.

Tear bread into big pieces and soak in water, remove and squeeze out the water.  Set aside.

Mix well minced pork with salt, dark soy sauce, and 3 tbsp of spring onion/ginger steeping water, stir in one direction until fairly dry, then add another 2-3 tbsp of the steeping water.  Continue to stir and beat until meat is sticky.  Add the water chestnut and mix to combine.  
Add in beaten egg and pepper, mix well and stir in potato starch.

Heat 5 tbsp of oil in frying pan, dab hands in water and roll meat into meat balls.  Pan-fry meat balls in the oil until light golden brown on the surface.  Transfer them to the claypot.  (Place 4 spring onion in the claypot before putting in the meatballs.)

Add wine, dark soy sauce, sugar and 3 cups of water to the claypot, bring to a boil over high heat, then cover with a lid and cook over low heat for about 1 1/2 hour.

Add blanched baby bok choy and top with water or add salt according to taste.  Cook for another 3 minutes.


Why do you need to add bread in the meatballs?
Adding soaked and squeezed dry bread in the meat mixture help create bulk and keeps the meatballs tender.  Do not add too much or else you will not get any fragrance from the meat.  Mashed tofu may also be used for the same effect.

My meatballs doesn't looked that tender enough; this is because I didn't braise long enough in the claypot!!


Thursday 20 October 2011

紅豆砵仔糕 Hong Kong Style Red Bean Pudding

I'd been not to myself lately and hence been lazy trying out new recipes. And so just day by day, just browsing on others beautiful food they have posted.  And when you are this lazy mood, sometimes it is good too viewing other bloggers posting their beautiful dishes, kuih, and cakes, it definitely will perks you up a bit and get you move right back to your track.

Those who have visited to Hong Kong might have tried this Steamed Rice Cake with red beans in it.  Well, I've been to Hong Kong but unfortunately I have not try this steam pudding before.  And if you are one person who like to watch Hong Kong TVB series, you may have come across this well talked about "Put Chai Koh" at times in the episodes.


This 紅豆砵仔糕 Hong Kong Style Red Bean Pudding / Put Chai Koh
adapted from here. 

Ingredients:
100g rice flour
30g wheat starch
20g water chestnut starch
25g glutinous rice flour
60g raw brown sugar
50g dark brown sugar
2 cups water
Cooked Red beans

Directions:
1.  In a large bowl, combine rice flour, wheat starch, water chestnut starch and sticky rice flour.
2.  Place the raw brown sugar and dark brown sugar with water in a saucepan and bring to boil till the
     sugars completely dissolved. Stir into flour mixture little at a time (divide a few times to stir in).
3.  Sieve the mixture into a pouring jug.
4.  Place small bowls onto steaming rack and let heat up with water. Bring water to a boil, pour mixture into
     small bowls, quickly add red beans. Cover and steam for about 20 minutes.
5.  Let cool for a bit. Use bamboo skewers to remove the pudding from bowl.


I am submitting this to
Aspiring Bakers # 12 : Traditional Kueh (October 2011)
hosted by SSB of Small Small Baker


Monday 10 October 2011

Strawberry Layer Cake With Whipped Strawberry Frosting

Just few weeks back or was it few months back? Oh, how time pass real fast nowadays and it is already October and few more months to go for another new year to arrive.  Anyway, let's get back to the topic I want to share,  my sister has asked her daughter what cake she would like to have for her birthday this year.  And so one day while walking pass by a bakery shop, she saw one beautiful looking fruit shape cake in the display fridge; and she immediately said she wanted to have that "Watermelon Cake" as her birthday cake.(You can view this Watermelon cake at the bottom of this post).

Since she wanted the 'Watermelon Cake', I thought I don't need to bake her any birthday cake but this watermelon cake is just a small cake and won't be enough for the guests.  Hence, I have this lovely Strawberry Layer Cake With Whipped Strawberry Frosting done as another birthday cake for her.  There's no harm having two birthday cakes at a go.  She can make two wishes....  and we celebrated her 9th birthday yesterday....


This Strawberry Layer Cake  fully adapted from this lovely lady Rosie of Sweetapolita
Yield: 3 x 8″ round layers

350g granulated sugar  (you may cut down this as I feel it is too sweet after combining with the Jell-O)
1 packet (85g) strawberry flavored gelatin (such as Jell-O)
227g butter, softened
4 eggs (at room temperature)
300g sifted cake flour
1 tbsp baking powder
¾  tsp salt
1 cup whole milk, room temperature
1 tbsp vanilla extract
¼ cup strawberry puree made from frozen strawberries (puree itself should be closer to room temp, not frozen or icy)

Method
1.   If you’re making your own strawberry puree, remove frozen strawberries (about 2
      handfuls) from freezer and place in a single layer in a flat dish to thaw slightly. Place
      into food processor and puree the strawberries until smooth. Stir to ensure it is nice
      and smooth and not icy. Measure out 1/4 cup for cake and 3 tablespoons for frosting,
      and freeze the remaining puree for another use.
2.  Preheat oven to 350°F (180°C). Butter, line with parchment, and flour three round 8” 
     inch pans, tapping out the excess. Set aside.
 
3.  In a medium bowl or measuring cup, combine and stir the milk, strawberry puree and
     the vanilla. Set aside.

4.  Sift and whisk dry ingredients together in a medium bowl, and set aside.

5.  In the bowl of an electric mixer fitted with the paddle attachment, cream the sugar,
     gelatin, and butter on medium speed until light and fluffy–about 5 minutes.

6.  Add the eggs, one by one, mixing well after each addition and scraping down the sides
     of the bowl with spatula.

7.  Add the wet & dry ingredients to the creamed mixture by alternating–beginning and
      ending with dry ingredients and mixing just enough after each addition to incorporate,
      but not overmix.

8.  Divide the batter in three, spreading it evenly with a small offset palette knife. If you
     have a kitchen scale, weigh each pan filled with batter, to ensure 3 even layers.

9.  Bake 25-30 minutes or until a cake tester comes clean when inserted into the center. Be
so careful to not overbake. Check cakes at 20 minutes, but not before, and once you feel
it’s almost ready, set the timer for 2 minute intervals. Let cool on racks for 10 minutes  
before loosening the sides with a small metal spatula, and invert onto greased wire
 racks. Gently turn cakes back up, so the tops are up and cool completely. 

10.  Wrap tightly and store at room temperature for up to 2 days, refrigerator for up to 5
       days, or frozen for up to 2 months. Best eaten day one.

Whipped Strawberry Frosting
375g unsalted butter, softened and cut into cubes
500g confectioners’ sugar (icing, powdered)
1 tbsp milk
1 ½  tsp vanilla extract
pinch of salt
3 tbsp strawberry puree made from frozen strawberries (if you want the frosting seed-free, you can put the puree through a sieve before adding to frosting)

Method
 1.  In the bowl of an electric mixer fitted with the paddle attachment, whip butter for 8 minutes on medium

     speed.  Butter will become very pale & creamy.

2.  Add remaining ingredients, except strawberry puree, and mix on low speed for 1 minute, then on medium
     speed for 6 minutes.  Frosting will be very light, creamy and fluffy.

3.  Add strawberry puree and mix until incorporated.

4.  Best used right away, but can be covered in an airtight container at room temperature for a day or so.

Strawberry Layer Cake Assembly
1. Place a cake layer face-up on cake plate or 8″ round thin cake board.
2. Place 1 cup of frosting on top, and spread evenly with a small offset palette knife.
3. Repeat step 1-2.
4. Place final layer, face-down (bottom of cake layer is facing out). Place a generous scoop of frosting on
    top, spreading evenly with a small offset palette knife and working your way down the sides until you have
    a thin layer of frosting over the entire cake. Use a bench scraper to achieve very smooth sides. Chill until
    set — about 30 minutes.
5. Remove from refrigerator and cover with a final layer of frosting.
6. Finish with any decorations of choice, or frosting borders.
7. Store in a cake keeper at room temperature for up to 2 days, or in refrigerator for up to 5 days. As with
    most cakes, it’s best eaten day 1.

 
The cake was a little too sweet..... and I feel it is better to cut down the granulated sugar as the Jello-O already has sugar content in it.  And I made some Sicilian Orange Cupcakes so other children can take home a cupcake.

    So here... this is the "Watermelon Cake" that I mentioned earlier.....

     The lovely birthday girl has two birthday cakes!  Smiling happily on her face.

Monday 3 October 2011

Poached Pears in Spiced Cranberry Syrup

A few months ago, my sister has kept reminding me to watch Junior Masterchef on Okto Channel.  She has so much good words for this show and after it was on air, the next day she would called me and asked "Did you watch yesterday Junior Masterchef?"  Sometimes I totally forgotten to watch it.  So the next time when it was about to start the show, my sister will text me to remind me again.  So I thought what is so special about this show.  And when I watch one episode, I was so amazed and believe me, stunned and shocked too....how those little children could whipped up such a beautiful and delicious dishes.  These children contestants are as young as 8 years old, could you believe it?  They are so much better than some of us adults cooking up a meal.

There was one episode, the contestants were split into two groups, and in the end one of the group lose out and each one of them have to prepare up one same dish that is called "Poached Pears in Spiced Cranberry Syrup, Vanilla Mascapone and Tuille" and the judges will give point to the one who makes the perfect poached pears.

I have came across most bloggers post their poached pears in red wine and thought I would like to try this poaching in fruit juice instead.


Ingredients
750ml cranberry juice
125ml rose verjuice (I used Roselle juice)
60g caster sugar
3 star anise
1 cinnamon quill
2 just-ripe pears, peeled (I used Forell)

1. Combine cranberry juice, Roselle juice, sugar, star anise and cinnamon in a medium saucepan and bring to
    a simmer.

2.  Peel the pears, keeping the stalk intact, then place into the liquid, turning pears occasionally, for 35
     minutes or until tender – this can be checked with a skewer inserted into the thickest part of pear.
     Remove from heat then carefully remove the pears from the liquid.

3. Place 2 ladles of poaching liquid into a clean saucepan (approx 200ml) including the cinnamon and star
    anise and return to the boil, simmer for 5 minutes or until syrupy. Stand until ready to serve.


   Since I loves dessert alot, this poached pear is indeed delicious to me.  Do try it if you prefer using fruit
   juice instead of red wine to poach the pears!

   And I remember when I was a young girl, my mum used to poached apples for us.  Delicious!

Thursday 22 September 2011

Nothing special.... just a Chocolate Walnut Cake

What is the most dreaded thing to do after you completed your cooking?  What else... cleaning up and washing the dishes!  How lucky to those who have a maid at home to do all the chores!  Unfortunate the household here in Malaysia don't usually own a dishwashing machine.  When I was in NZ, all homes have one.  It just the weather is too cold to get your hands into the water!  Know what, some would put the dirty dishes in the machine and only start to wash it only when it is full.  So, you can imagine dirty dishes in the machine for days before they do washing! ee.....

I was craving for some chocolate lately and thought of baking a chocolate cake.  Hence, this Chocolate Walnut Bundt cake.  I didn't do up the topping glaze but instead just melt up some chocolate and drizzle on top.  Regret!  Looks ugly, isn't it? 


Recipes source from Martha Stewart's site

For the Cake
2 1/2 cups all-purpose flour
1/2 cup unsweetened cocoa powder
1 teaspoon baking soda
3/4 teaspoon salt
1/2 cup whole milk
1/2 cup sour cream
226g unsalted butter, plus more for pan
1 1/2 cups sugar
4 large eggs
1 teaspoon pure vanilla extract
1/2 cup chopped walnuts (optional)

For the Glaze
3 ounces bittersweet chocolate, chopped
1/2 cup heavy cream
2 tablespoons unsalted butter
2 tablespoons Cognac or rum (optional)

Directions

  1. Make the cake: Preheat oven to 325 degrees. Butter a 14-cup Bundt pan. Whisk flour, cocoa, baking soda, and salt in a large bowl. Mix milk and sour cream in a small bowl.

  2. Cream butter and sugar with a mixer until light and fluffy. Beat in eggs, 1 at a time, then vanilla. Reduce mixer speed to low, and add flour mixture, alternating with milk mixture, ending with flour. Fold in walnuts, if using. Spoon batter into pan. Bake until a tester inserted in center comes out clean, 55 to 60 minutes. Let cool in pan on a wire rack. Invert cake. (Cake will keep for up to 1 day.)

  3. Make the glaze: Place chocolate in a bowl. Heat cream in a small saucepan until simmering, then pour over chocolate. Let stand for 2 minutes. Add butter and Cognac or rum, if using, and mix until smooth. Let stand, stirring occasionally, until slightly thickened. Pour glaze over cooled cake.
     

Wednesday 21 September 2011

Shepherd's Pie

Browsing at cookbooks, searching at blogs and sites, all Shepherd's Pie slight differs in the ingredients; and there's no rules how you should cook it and bake it.  Just go with your taste and liking whichever ingredients you wanted it in.

I grew up eating potatoes all the time so dishes with potatoes I definitely will go crazy about!


Ingredients
2 large Russet potatoes, peeled, boiled & mashed
30g butter
30ml milk
150g mince meat (beef or chicken or pork)
1 medium brown onion chopped finely
1 medium carrot chopped finely
1 small broccoli, cut into small pieces
1 tbsp Worcestershire sauce
1/2 can of Campbell Mushroom soup
150ml water
1.  Mashed the potatoes together with 30g butter and milk till well blended.  Set aside.

2.  Heat 1 tbsp oil  in frying pan; cook onion, mince meat, carrot and broccoli, stirring until tender.  Add in 
     the Worcestershire sauce, stirring, 2 minutes.  Stir in the Campbell mushroom soup and water.  Cook 
     till everything comes blended together for 5 minutes.  Dish up into a round or oval baking dish.  Spread
     over top with the mashed potato.

3. Bake the pie at a preheated oven 180C for 30 minutes or till the potato is bubbling and slightly browned.


    Both my sister and I enjoying this Shepherd's Pie so much as each scoop goes into our mouth, there
    will be a sound of "hmmm" and "oooh".  Delicious!


          Nothing left............

Tuesday 20 September 2011

Matcha Ice Cream

Nowadays we used Matcha (Green Tea) in our baking, dessert, dishes, mooncakes, etc; anything you can come of with.  This Matcha Ice Cream is absolutely yummy.  Do try it if you get hold of green tea powder as the ingredients are just milk, sugar and cream in it only.  Simple and absolutely delicious!

Matcha Ice Cream
adapted from Nami of Just One Cookbook

Ingredients

1 cup whole milk
1 cup cream
1/2 cup sugar
3 tbsp Matcha (Green Tea powder)
Pinch of salt

1.  Freeze your ice cream bowl for 24 hours.

2.  In a medium sauce pan, whisk together the milk, cream, green tea powder, sugar, and salt.  Heat the
     mixture till it comes to a full boil. Keep whisking until mixture starts to foam, then remove from heat.

3. Pour the mixture to a large bowl to cool down.  Refrigerate the mixture until completely chilled.

4. Next day, pour the mixture to the ice cream bowl and churn for 20-25 minutes in the ice cream maker,
    according to manufacturer’s instructions.  Transfer into a container and freeze for at least 3 hours before
    serving. 

 
    I urge you to try it, absolutely delicious!

Monday 19 September 2011

Croquette


Most of the time when we were asked what is our favourite food at all times, we would usually said "My mother home cooked dishes!" or we would said, "My mom makes the most delicious ........something like this too".  When my parents moved to Auckland, I have always craved for our mom's home cooked food.  So sometimes when I try to cook something similar to what my mom used to cooked, sometimes it doesn't turn out the same taste and I will have to call to her and asked her what is missing in my dishes! This is the life how is when we stay away from our beloved mom.

When I'm in my childhood, my mom used to cook simple western style dishes for us.  Eventhough it is done in a simple way of cooking, I still love my mom's home cooked dishes though time have changed whereby we can alter and create many ways putting different ingredients in them.

Croquette is one of the 'snack' my mom used to make for us.  Hers is more simple than what I am making today.  My mom's croquette has alot of love in it!  I was at my sister's house in Spore last week and I make this croquette for all of us to savour...... I will make this again for my mom when my next visit her in Auckland next year.


This delicious Croquette I have made is adapted from Nami - Just One Cookbook

Ingredients:
4 russet potatoes, boiled and roughly mashed
1 large onion, finely diced
1 small carrots, finely diced
2 Shiitake mushrooms (optional)
2 Tbsp. oil
450g ground meat (beef/chicken/pork)
1 egg
1 tsp. salt
¼ tsp. white pepper
Freshly ground black pepper
2-3 eggs, lightly beaten (put into a shallow plate)
2 cup Panko/breadcrumbs  (put into a shallow plate)
½ cup flour  ((put into a shallow plate)
Oil for deep frying

1.  In a large skillet, heat oil on medium high heat.  Put in the onion and sauté until soft.  Add carrots and
     Shiitake mushrooms and cook until they are soft.

2.  Add the meat and break it up with a wooden spoon.  When the meat is cooked, add salt, white pepper,
     and black pepper. Turn off the heat.

3.  Add the meat mixture to the mashed potatoes and mix all up well together with the 1 egg in.  Let it rest
     to cool down a little so you have worked with your hands later on.

4.  As the mixture is still warm, start making your Croquette balls.  You can form it into a balls and flatten it
     or make it in a longer shape.  Any shape to your desire.

5.  Dredge each croquette balls into the flour - egg - breadcrumbs.

6.  Deep fry the croquette till golden brown only.

    Everyone can make croquettes and it is so easy to make.  My dad help me to deep fry it!  Thanks Dad!

   
    It is best to steam or microwave the potatoes instead of boiling, so the mashed potatoes won't be that wet.


My dear niece is enjoying her piece of croquette made by her Aunt Mel!

Sunday 18 September 2011

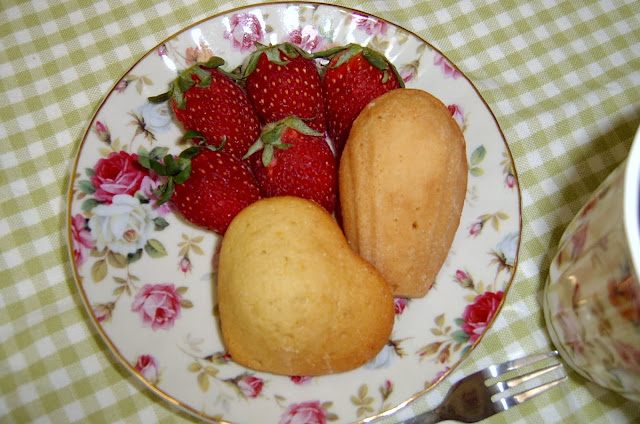
Madeleines

It been quite awhile I have not updated or publish any post as I didn't have the mood to bake or cook anything special.  Well, in fact I did, I've baked a fruit cake and some mini buns.  Just doesn't have the mood spending time taking shots from it.

And today, I bake Madeleines.  First time baking madeleines and.........  first time tasted what is a Madeleines!! 


The Madeleines ingredients called for .....

2 eggs
100g icing sugar 
1 grated orange zest (original recipe called for lemon zest)
100g cake flour
20g ground almond
3g baking powder
100g unsalted butter (melted)
1 tsp vanilla essence

1.  Sieve flour and baking powder.
2.  Whisk eggs with icing sugar.  Add orange zest and ground almond, whisk till soft peaks.
3.  Fold in flour and baking powder.
4.  Stir in melted butter, bit by bit.
5.  Mix in vanilla essence.
6.  Pour batter into a bowl and shrink wrap it to refrigerate for 12 hours.

After 12 hours or more.......
7.  Preheat oven to 200C.
8.  Brush the madeleine molds with melted butter and sprinkle flour onto it.  Tap the pans to remove excess
     flour.
9.  Remove batter from fridge and spoon the batter into the madeleine molds.
10. Bake in oven for 3 minutes thereafter reduce to 180C for 10-12minutes or till skewer comes out clean.
11. Unmold and cool on rack.


See the hump?  That is normal.......  a hump on the back!  Can't stop and resist myself from munching away as I busy taking pictures of it.  Munch, munch, munch and it taste delicious when it is fresh out from the oven....  Want one?